Tutorial on MongoDB
In this tutorial we'll go over setting up mongodb local environment and some basic queries and data creation/manipulation/deletion (DCL, DML, DDL) operations
NoSQl vs SQL
Each one has its own advantages and disadvantages, NOSQL has no structure to the data, if your schema design does not contain a specific structure or relationship between entities then NOSQL is the option to consider.
But if you want to maintain a relationship between entities then SQL is the way to go
What do we mean by a relationship?
Example
Let us consider a prison database, A prison, a Prisoner, A cell are all entities.
 A relationship between these entities can be listed as follows.
 A prison has many prisoners, a cell has one prisoner, a prison has many cells etc..copy
"has many", "has one" are called as relationships.
If you want to the store data in a structure less format then NOSQL will come into picture, let's take an example and define it in SQL and NOSQL.
You write the prisoner entity as follows,
- Should have an primary key or an identifier unique to the prisoner
- name
- age
- DOB
Suppose this is the structure you created for the prisoner entity, if in 90% the entries to prisoner entity you did not want to enter the DOB, you still need to add a column to the table in case of SQL. But in case of NOSQL since there is no structure each entry is an independent record. One prisoner can have a DOB and name, one of them can have one name etc..
Thats the primary difference between NOSQL and SQL.
Now lets dive into NOSQL and explore how to use it.
Head over to MongoDB downloads pages, and download the server based on your platform
Mongodb DownloadsFor windows
Download the msi installer, which will take a few minutes to download, once that is done, click on the msi file and follow the steps.
Install the complete tool, and follow all default steps. Lastly, there is a checkbox to install mongocompass, do not uncheck that box. We'll go over what is the use of mongocompass later in this tutorial
Wait for a couple of minutes for the installer to finish.
For Mac users
,Download the zip file from mongo wesbite by selecting the platform as Macos.
Open the terminal, change your directory to the downloaded location.
Extract the zip file,
tar xzf \entire file name\copy
copy the extracted contents into the /usr/local/mongodb
sudo mv \downloaded folder\ /usr/local/mongodbcopy
change your directory to /usr/local/mongodb/
For windows:
Go into the directory where mongodb was installed, create /data/db directories.
Open command prompt in admin mode.
Change directory to mongodb location.
cd bin
mongod --directoryperdb --dbpath C:mongodb...copy
lets start the mongo service.
net start mongodbcopy
From the bin directory, run
mongocopy
For Mac:
create two directories data and db,
mkdir -p /data/dbcopy
Change dir to db,
cd /data/dbcopy
Give the current user permissions to access the file
sudo chown 'username' /data/dbcopy
go back to the home directory, cd
Now we need to add the mongo runtime executable to the bash_profile.
Open the .bash_profile in a text editor and add the following dirs paths to the end of the file.
export MONGO_PATH=/usr/local/mongodb"
"export PATH...copy
Now we need to start the mongo server and link the client to that server, so that we can perform all the data operations.
Open two terminals, run the following on one of the terminal "mongod"
And on the other terminal run mongo
Here mongod is the daemon that receives the commands from the mongo CLI which is the client.
To check if the connection is working
Run show dbs on the client and see if you get an output
Now lets run some DCLL, DML commands.
show dbscopy
use myprofilecopy
Lets add a admin user who will be using this database
db.createUser({
                user: 'admin',
...copyCollections
A collection is a set of documents.What is a document?
A document is a record representing some data.
To create a collection, lets run:
db.createCollection("potentialContacts")copyAll the data in mongo is stored as a JSON.
Lets open a json formatter so that we can insert data into our collection.
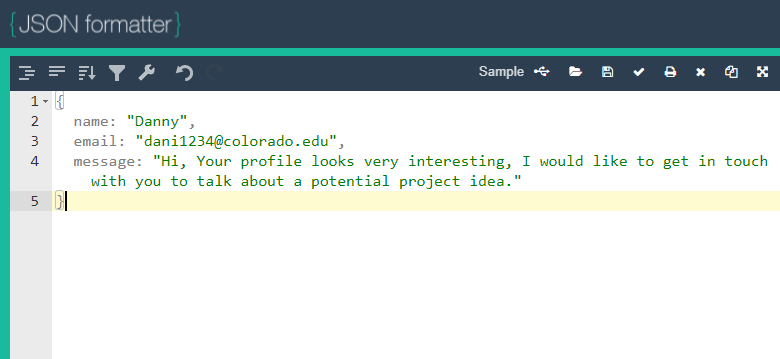
db.potentialContacts.insert({
...copyto see if the data is inserted, lets explore our potentialContact collection
db.potentialContact.find();
copydb.potentialContacts.insert({
...copydb.potentialContacts.find();copy
db.potentialContacts.find().pretty();copy
db.potentialContacts.update({ name: "James" }, { e...copydb.potentialContacts.find().pretty()
copydb.potentialContacts.update({ name: "Danny" }, {$s...copydb.potentialContacts.update({ name: "Danny" }, {$u...copydb.potentialContacts.update({$rename: { "email": "...copydb.potentialContacts.remove({ name: "Danny" })
...copydb.potentialContacts.insert([
{
...copydb.potentialContacts.find({$or: [{name: "James"}, ...copydb.potentialContacts.find({
me...copydb.potentialContacts.find({
"m...copyExercise
- Create a collection called "subscribers"
- Add 5 entries with email-id, isSubscribed field, subscriptionType
- Filter all the entries where isSubscribed is true
- Get the total count of subscribers who have subscribed to subscriptionType = 'newsletter'
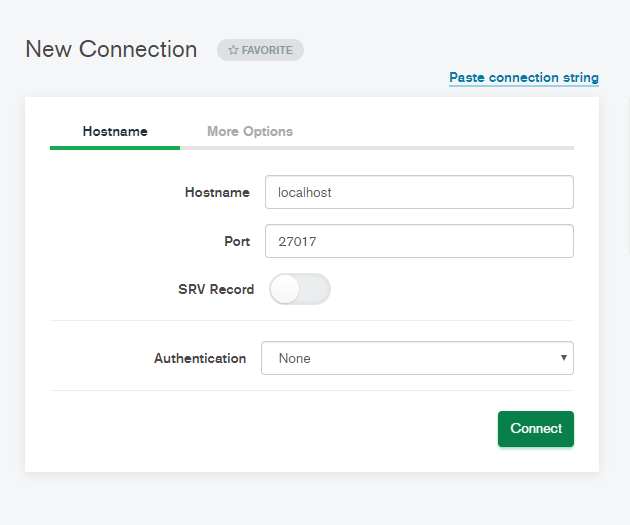
Using mongocompass
Once you are familiar with using the command line interface, you can use the UI provided and explore your database and collections.
Open MongoCompass and follow the steps to view your database.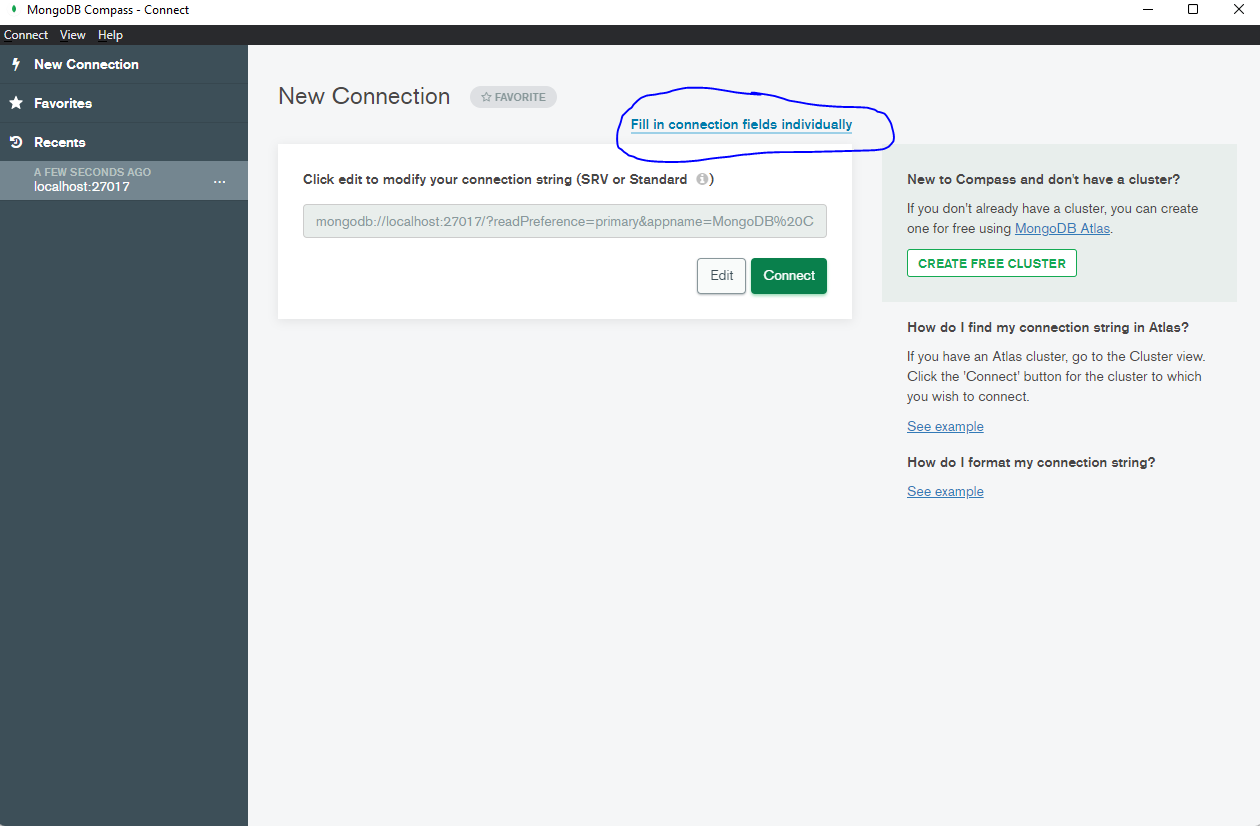
That brings us to the end of the mongodb tutorial.
For more info head over to MongoDb Docs Back to: React TutorialNext Tutorial: Node Tutorial